Showing posts with label Food. Show all posts

Thursday, April 16, 2015

Homemade Garlic & Onion Bagels


My sister started making bagels a few months ago and she kept telling me how easy it was. I thought it was worth trying to do it to see how easy or hard it was and how good the bagels tasted. Let's just say that I will never buy another packages of bagels every again. These taste amazing! My original source of the the bagel recipe is here but I have altered it some. 

The bagels that I make most often are onion and garlic bagels. They are my favorite. I add all the dry ingredients then add about a tablespoon of minced garlic and a half of a small onion. (**Side note: I added to much of an onion in a recent batch and my bagels didn't turn out. I think it was because there was to much moisture in the onion).
Once all the dry ingredients are in the mixer, turn it on low and mix the dry ingredients up. After they have been roughly mixed up add your warm water slowly. I always try to pour the water down the side of the bowl so the dough forms a little faster. You should allow the dough to mix for about 4-5 minutes, then you need to turn the mixer up to a medium speed and mix your dough for another 7-10 minutes. 
Once the dough is a nice consistency place it in a greased bowl and place a tea (or kitchen) towel over the top. Place the bowl in a warm dry place and allow dough to rise for about an hour. The dough should just about double in size. After the dough has risen, gently punch it in the middle to deflate and place the dough on a clean surface. 
 This recipe makes about 8 bagels so to keep things easy when dividing the dough up everything is cut in half. Cut the large mass in half. Then cut the half in half to make 4 quarters, then take each quarter and cut those in half and you should have 8 pieces of dough roughly the same size. Take each piece of dough and form it into a ball. Next poke your finger through the middle of the dough ball and evenly distribute the dough so it looks like a bagel. Once you have made all your bagels, place the towel over them again and let them rise again. At this point you need to get a large pot of water and bring it to a boil. Once the water has boiled, turn it down so it is just a bubbling. This usually takes about 10 or so minutes which is just enough time for your bagels to have risen just a bit.
Place 2-3 bagels in the bubbling water for about 1 minute on each side. Take them out of the water and place them on a greased cookie sheet. 
 The oven should be heated to 425 degrees and the bagels need to be cooked for 20-25 minutes or until they are golden brown on the top. Let them cool completely before you toast them up. These bagels taste AMAZING. My favorite way to eat them with onion and chive cream cheese. I'm also a fan of real butter on them. Yum!!


Garlic and Onion Bagels
yields 8

2 1/4 teaspoons dry active yeast
2 teaspoons granulated sugar
1 1/3 cups warm water
3 1/2 cups bread flour, plus extra for kneading
1 3/4 teaspoons kosher salt
1 1/2 teaspoons garlic powder
1 Tablespoon minced garlic
1/4 - 1/2  small onion finely chopped

In the bowl of a stand mixer, add the flour, sugar, yeast, salt, garlic power, minced garlic, and chopped onion.  With the mixer on low, slowly add the water.  Continue to mix until the dough comes together in a mass, about 4-6 minutes.  Increase speed to medium-high and knead for another 8-10 minutes until soft and smooth.   Put the dough in a bowl sprayed lightly with non-stick baking spray. Cover with a towel or lightly oiled plastic wrap and let rise for 1 hour or until doubled in size. 

Gently de-gas the dough and let the dough rest for 10 minutes.

Meanwhile, preheat the oven to 425º F and bring a large pot of water to a boil; then reduce to a simmer. 

Divide the dough into 8 pieces.  Press each piece down to get rid of air bubbles.  Form into balls and roll the balls between your palm and the work surface, rotating to form a smooth ball. Coat a finger in flour and press it through each ball to form a ring.  Twirl the ring around the index of one hand and the thumb of the other, stretching the dough and widening the hole to about 1/3 of the bagel’s diameter. Place the bagels on a baking sheet lined with parchment paper or a silpat and cover with a towel. Let rest for another 10 minutes.

Gently lower the bagels into the water in batches, 2-3 bagels at a time. Boil uncovered for about 1 minute. Turn them over once and boil for another minute. Using a perforated skimmer, remove the bagels from the pot, letting the water drain; return to the baking sheet. (Optional:  sprinkle the top of the bagel with poppy seeds, sesame seeds, or both). Bake for 20-25 minutes or until golden.  Transfer to a wire rack to cool completely.  Enjoy!

Adapted from The Galley Gourment


Wednesday, October 22, 2014

The 2014 Garden

In previous years we have done a vegetable garden and usually by about July the weather is so hot that we usually give up and don't get a whole lot out of the garden. This year we made it a point to really take care of it. We started most of plants from seed. And as with every year we learned a lot and what to do and not to do for next year. 
We tried something different this year with the tomatoes. I decided to use these things call Grow Boxes. I figured that the last 3 years that I have grown tomatoes I may have gotten 10 tomatoes total it couldn't hurt to try something new. I bought 3 Grow Boxes and they recommended that I only put 2 tomato plants in each box, so that's what I did. I did a one box with beefsteak tomatoes, one with plum tomatoes, and the last box had cherry tomatoes. Two of the three worked really well. In fact I'm still getting plum (Roma) tomatoes now in October. I learned a lot by using these boxes and I will be using them again next year for my tomatoes. 

Peppers were another thing that we did this year. We tried several different types of peppers and again I'm still getting peppers in October. We got so many peppers that I had to send Tim to work with them. I did learn that I'm not going to grow as many of a particular type of pepper. Most of the peppers were hot peppers and I have no idea how I'm going to use all of them but I guess I'll figure something out.

I did can most if not all of the peppers that came from the garden. Most of them were pepper medleys because lets be honest, I was kind of over doing them separate. I did do several different type of things with some jalapeños. I made pepper jelly, candied jalapeños, and pickled jalapeños. I can tell you that the pickling recipe that I used is AMAZING!!! I have no idea which one I used but I need to find it because it came out so well. I haven't opened any of the pepper jelly or the candied jalapeños so I don't know what they taste like, but I will keep you posted.
Peach Jam was another new thing this year as well. It came out really well also. I look forward to putting it on hot bread in the winter. I have given some of it away and have had good reviews so far. Next year I do think I'm going to just can some sliced peaches. I think they will be good in peach pie or peach cobbler.
I learned a few things about zucchini this summer. First, kill the squash bugs before they kill your crop. We lost a few plants in the beginning to the devil squash bugs. Tim used an entire bottle of liquid Seven Dust on the plants and that seemed to do the trick. I also froze a lot of the zucchini. Another thing I learned it not to blanch the zucchini before you freeze it. I haven't really enjoyed the end result on that one. I learned that early and towards the end I was just cutting it up and sealing it with the vacuum sealer. I also think that next year I will add some summer squash (the yellow one) to the garden as well. One of our favorite things in summer is grilled zucchini with parmesan cheese. Yum!
These are my candied jalapeños. As I previously mentioned, we haven't tried any of these yet but from what I am told yo are suppose to put cream cheese on a cracker and top with candied jalapeños. It's suppose to have that salty, sweet, with the spice added in at the end. It's something else I'm looking forward to trying once we have a few things around here finished up. 


My red peppers took longer that I had anticipated to come in and my dog, Dakoda, hasn't helped that situation either. We kept wondering why we weren't getting any peppers. Well Dakoda kept pushing the fence down and eating them right off of the plant. He paid for it slightly by eating the hot peppers, thus, causing him to use the bathroom every 20 minutes for about a week. I think he finally learned his lesson. We have to put up a bigger fence next year.

The eggplant has surprised me the best. I have had 3 different batches of eggplant. Its really good too. I really LOVE free food. I think for this last batch I'm going to make eggplant parmesan and freeze it for when my dad comes to visit for Thanksgiving.
I did my first attempt at salsa this year as well. We haven't opened any of the jars that I made yet and I'm hoping that it turned out okay. I'm worried that it doesn't have enough salt in it. The last batch I made we had to mix it with the store bought stuff. I made the canning batch a little different so I'm crossing my fingers that it comes out well. 
This was our first attempt at a potato box this year. Out of the whole box this is all we got for potatoes. Again, another learning experience so we will try again next year. I think we waited to long to plant the potatoes. We need to plant earlier next year I think. I also think that it will help to clean out garden at the end of this year so we don't have to do as much prep to get the stuff in the ground. So far we have done that.

Next year we are adding a few more things to the mix. I think we are going to try and grow corn and do a better job at protecting the brussel sprouts. The white butterflies killed them this year. Next year we have to "tent" them in white screen to keep the bugs at bay. We get better and better each year and I hope that next year will be the best year yet!

Monday, May 12, 2014

Bucket List Update: Item #109 - Eat a Meal Backwards - CHECK!!

While Tim was deployed I had planned a trip to go and see my best friend, Beth, in St. Louis for Thanksgiving. The last time I was in St. Louis Beth took me to this place called Lotawata Creek. No joke, they have had some of the best food that I have ever tasted. As I planning this trip I looked at what I had accomplished (which was quite a lot actually) on my Bucket List and what I could still get done with Tim being deployed. Then towards the end of the list #109 Eat a Meal Backwards and I thought of Lotawata Creek. So the day before I left to come back to Oklahoma we went to Lotawata Creek for dinner. 
 Dinner started with dessert (and yes I made those signs to go with each course). Dessert was a hot fudge sundae. By no means was it the best hot fudge sundae I have ever had but it worked. Their food is so much better. I might have to revisit this bucket list item at the Cheesecake Factory.
I have no idea what this is called but it was AMAZING!!! I only ate like half of it because the fried stuffed mushrooms and fried pickles were on the way to the table. 
 The appetizer was, again, AMAZING! I wish I knew how to make these because I would really try. How impressive would that be.
 These were the fried pickles. They were still really good too but nothing like the mushrooms. Also the pickles probably wouldn't be good for leftovers where the mushrooms still taste good reheated.
 So this was the last thing that I crossed off my bucket list in 2013. I'm working on a few things for 2014 and hoping to hit some of them soon.


Thursday, March 21, 2013

Irish Car Bomb Cupcakes

Saint Patrick's Day is one of my favorite holidays, if it is really considered a holiday. Each year from as far back as I can remember we always at corned beef and cabbage. When I got married I still make corned beef and cabbage but wanted some sort of dessert to go with it. My mom gave me a great recipe of Irish Soda Bread (minus the raisins) and that's what I would make...until last year.
 Last year my friend, Beth, found a recipe for Irish Car Bomb cupcakes and I knew I had to make them. So my good friend Pinterest was the source of my recipe last year and they came out okay. I mean you know how it is when you first make something, you figure out what works and what doesn't.

This year I used this recipe and they were awesome!!!! I can not stress how awesome they were to eat. The cake portion has the Guinness, the gauche has the Jameson, and the frosting has a generous amount of Bailey's. My only change would be to add just a touch more Guinness to the cake portion. Other than that, I think its perfect.

 Everyone that has eaten one of these cupcakes has loved them! I really need to work on my decorating skills. I tried the "ice cream cone" look and well I think I need to take a class or something.


Monday, October 08, 2012

Reese Peanut Butter Cake...Round 2

Last year I made this cake for Tim's closeout at work. You can read about it here. Tim was asked if I was going to make it again this year. I had not planned on making this again but at the last minute I gave it and I'm glad that I did. It came out much better than last year. 

For what ever reason I couldn't sleep and ended up being wide awake at 5 a.m. I figured while I was up I might as well start the cake part that way later I just have to decorate it. This was a bad decision. I made the cakes and they got stuck in the pan and they fell apart so badly that even the massive amounts of frosting could not fix it. So I started over and greased, sprayed, and floured the pan and I had no issues with the cakes coming out of the pans. 
Max was helping me. I gave him the beater to lick and he just threw it back in the batter.
I used the same cake recipe at last year.

Cake
  • Nonstick vegetable oil spray
  • 3 cups all purpose flour
  • 2 cups sugar
  • 2/3 cup sifted natural unsweetened cocoa powder (sifted, then measured)
  • 2 teaspoons baking soda
  • 1 teaspoon salt
  • 2 cups water
  • 2/3 cup vegetable oil
  • 2 tablespoons apple cider vinegar
  • 2 teaspoons vanilla extract
Preheat oven to 350°F. Spray two 9-inch-diameter cake pans with 2-inch-high sides with nonstick spray. Line pan bottoms with parchment paper. Sift flour, sugar, cocoa, baking soda, and salt into large bowl. Whisk 2 cups water, oil, vinegar, and vanilla in medium bowl to blend. Gradually add water mixture to dry ingredients, whisking until batter is smooth. Divide batter between prepared pans (scant 3 cups each).

Bake cakes until tester inserted into center comes out with a few crumbs still attached, about 28 minutes. Cool cakes in pans 15 minutes. Cut around cakes and turn out onto racks. Peel off parchment and cool.

Filling
  • 8oz semi-sweet chocolate, roughly chopped

  • 8oz heavy cream
  • 1/2 cup creamy peanut butter
  • 1/2 cup Reese's peanut butter cups, roughly chopped
Heat the cream until it just begins to boil. Pour it over the chocolate in a medium bowl. Whisk until the chocolate melts, then whisk in the peanut butter until it's all incorporated and smooth. Set aside 1/4 of the filling for the first layer of frosting. Cool the other 3/4 completely, then gently stir in the peanut butter cups.
Frosting
  • 1/2 cup creamy peanut butter
  • 1/2 cup butter, at room temperature
  • 2 tsp vanilla extract
  • 2 cups powdered sugar
Cream together the butter and peanut butter. Add the vanilla, then the sugar. I beat mine until it was pretty fluffy

The "filling" getting hard in the frig.


 Thoughts on this cake: It came out WAY better than last year. This year's cake was moist, the filling was evenly distributed and the peanut butter frosting was much smoother and fluffier.

Disclaimers: Make sure you have a good amount of time to make this cake and to let the cakes cool completely and for the filling to harden up so that the frosting goes on smooth.

What I would change about the cake: NOTHING! It came out great and everyone loved it.

Friday, October 05, 2012

Bucket List Item #49 - Make Cannolis - CHECK


Bucket List Item #49 - Make Cannolis - Check!!

The Bucket List

Not everything on my list is going to be something crazy big feat but there are some things that are going to be more time consuming that others, this was one of those things. I have always loved cannolis and fell in love with them on a trip to the Italian bakery in NY while visiting Tim's family many many years ago. I mean come on, how many Italian bakeries do you know of in NC.

Regina, Tim's mom, asked if I have ever tried this or that as we walked through looking at all those calories staring at me in pretty fluffy colors of fat, fatter, and really really fat. When we came to the cannolis she asked if I had ever had one. I don't think that I had and she got one of every flavor. They were amazing!! Since then I have ordered one when ever the opportunity arose but alas they can be a bit pricey. So why not make some of my own right. So here we go.

I used this recipe and I was pretty pleased with the results. I did change a few things but only in the filling. I did not use the maraschino cherries and I did not add the heavy whipping cream. I think next time I will use the cream to make the filling a little bit lighter.

Okay first things first, make the dough for the shells. I ended up adding more wine than what the recipe called for. Why? I found the dough dry and not sticking together like it is suppose to. The recipe said to make sure you roll the dough as thin as you can get it, I suggest this also, your shells will turn out better and lighter.
After you roll the dough out you need to cut out circles to wrap around the tubes for frying. If you have a large circle cookie cutter, I would use this. I used the bottom of a plastic martini glass. It served its purpose but I think it took longer because I couldn't just cut and go.

Next you wrap your little circle around the tube making sure you seal your ends well. The first one I did wasn't sealed and I ended up with a puffed taco shell looking shape. But it did give me a chance to taste the shell and it had just the right amount of sweetness. 

Time to fry. Drop your wrapped tubes in your oil. I used shortening and I had my thermometer attached to the pan as I don't fry like this often and didn't want to have my oil to hot. Frying the shells take all of about a minute, no joke. You can not do anything else while you are frying or you will burn/over cook your shells. 
Take the shells out of the oil and let them drain on a plate on a paper towel. Make sure you let them cool off seam side down. When it is time to take the shell off I suggest using a dish towel to hold on to the metal tube. The shell will be warm but the tube will be hot. Just twist the shell gently and it should slide right off. The first couple were a little difficult but after those I had no problems. 

This recipe said it would make 24, give or take. I think that would have been accurate had I made the shells bigger. Next time I make these I'm making them bigger. They are great mini cannolis. Time for the sweeten cheese. If I had to make a suggestion, I would do the cheese before you start frying. This way it gives it more time to set up so it doesn't run all over the place when you pipe it in, like it did with mine. 
After the cheese is pipped in sprinkle with powdered sugar and garnish as you wish. I could have added more mini chocolate chips or whipped cream, but I was out of time so I just went with the powdered sugar and called it done. 
They tasted great and I think if the cheese was set up a little bit better the consistency would have been perfect. But this being my first time making these, I think they turned out really well. 


Things I learned making this cannoli recipe
  1. 1. The time it says to make these is WRONG. I mean really wrong. It took me several hours but I think part of that is due to #2.
  2. Have more than 4 cannoli tubes for frying
  3. Make the shells bigger. I used the recommended diameter of 3-4 inches (mine was 3") and that is way too small. They would have been great if I was feeding 30+ people. Going to go with a 4" diameter next time
  4. Let the cheese set up longer. I was in a rush as I had to have these delivered by a certain time so the ricotta cheese literally only had about 30 minutes to set up. I don't think that is enough time. Because the cheese wasn't set it was running out of the sides of the shells. **(The next day the cannolis were great and just the way they were suppose to be)**
  5. Make them the day before and if you can have someone help you with all the steps. Maybe set up an assembly line.

On to another bucket list item.

Thursday, September 29, 2011

A Little Bit of Baking


Tim has had to work late pretty much ever day for the past 2 weeks and tonight and tomorrow night he will be working even later, like till about 11 p.m. and tomorrow till about 1 a.m. So his office has a party/dinner each year on these two days. Tim asked me to make dessert. He asked me to make the chocolate chip cookie dough truffles, which I still am, but I wanted to make something a little more over the top. I think I accomplished that.
 It is called Reese Peanut Butter Cake and boy does it look awesome, I just wish I was going to be able to eat it. The cake is chocolate cake, made from scratch and it is egg less. It looked very moist. The filling of the cake is a layer of chocolate peanut butter fudge with chucks of Reese peanut butter cups. I had to dump the chocolate on top and let it harden before I could frost it with the peanut butter frosting. Oh, don't kid yourself, there is nothing healthy about this cake, I'm sure it is about 1000 calories a slice but damn does it look good. I have included the recipe below as it pulled it from several different sites.
 Reese Peanut Butter Cake
Cake
  • Nonstick vegetable oil spray
  • 3 cups all purpose flour
  • 2 cups sugar
  • 2/3 cup sifted natural unsweetened cocoa powder (sifted, then measured)
  • 2 teaspoons baking soda
  • 1 teaspoon salt
  • 2 cups water
  • 2/3 cup vegetable oil
  • 2 tablespoons apple cider vinegar
  • 2 teaspoons vanilla extract
Preheat oven to 350°F. Spray two 9-inch-diameter cake pans with 2-inch-high sides with nonstick spray. Line pan bottoms with parchment paper. Sift flour, sugar, cocoa, baking soda, and salt into large bowl. Whisk 2 cups water, oil, vinegar, and vanilla in medium bowl to blend. Gradually add water mixture to dry ingredients, whisking until batter is smooth. Divide batter between prepared pans (scant 3 cups each).

Bake cakes until tester inserted into center comes out with a few crumbs still attached, about 28 minutes. Cool cakes in pans 15 minutes. Cut around cakes and turn out onto racks. Peel off parchment and cool.

Filling
  • 8oz semi-sweet chocolate, roughly chopped
  • 8oz heavy cream
  • 1/2 cup creamy peanut butter
  • 1/2 cup Reese's peanut butter cups, roughly chopped
Heat the cream until it just begins to boil. Pour it over the chocolate in a medium bowl. Whisk until the chocolate melts, then whisk in the peanut butter until it's all incorporated and smooth. Set aside 1/4 of the filling for the first layer of frosting. Cool the other 3/4 completely, then gently stir in the peanut butter cups.

Frosting
  • 1/2 cup creamy peanut butter
  • 1/2 cup butter, at room temperature
  • 2 tsp vanilla extract
  • 2 cups powdered sugar
Cream together the butter and peanut butter. Add the vanilla, then the sugar. I beat mine until it was pretty fluffy.

Assembly

Place one 9-inch round on a cake stand or plate. Cover the top in the peanut butter fudge filling. Place the second 9-inch round on top. Using the reserved filling, spread a thin layer on the outside of the cake. Refrigerate until the fudge is set and firm to the touch.
Slather the whole thing in the peanut butter frosting. Decorate with peanut butter cups.
**The only thing I would change about this recipe would be to make sure that your peanut butter frosting is smooth and creamy. My was a little clumpy but it still tasted good, just didn't look all that great and didn't spread very well on the cake.

I also saw a recipe for Sugar Cookie Truffles. They looked interesting and thought I would try them. They are okay, not my favorite and I would make them again, but not for myself. I'm sure everyone at Tim's work is going to love them but I have had better truffles. The recipe is below.


Sugar Cookie Truffles

Ingredients1 16 oz. package of sugar cookie dough
2 ounces of cream cheese, room temperature
4 oz white melting chocolate OR 1 cup white chips
1 Tablespoon shortening
sprinkles for garnish

Directions
1. Bake cookies according to package directions until CRISP and cool completely. (You will likely have to cook them a little longer than the package instructs.)

2. Add the cookies to a blender or food processor and process until the cookies are fine crumbs. Add cream cheese and process until they begin to hold together. (You can also do this part by hand, which is what I did. It was messy but it worked. The mixture is going to feel a little dry, which is OK.)

3. Line a cooled baking sheet with wax or parchment paper. Roll dough into 1 inch balls and place on sheet. Freeze about 20 minutes.

4. Melt white chocolate and shortening according to package directions. Dip each ball into melted chocolate and add sprinkles while wet.

5. Allow to dry completely before storing, covered, in the refrigerator.

Link to webpage where I found the sugar cookie truffles
http://www.mrsbettierocker.com/2011/02/sugar-cookie-truffles.html

Tuesday, June 14, 2011

All you Need is Lettuce

My good friend Beth said that she was speaking to her friend about the "regular" meals that they make for their family. Beth told this friend about my Big Salad meal which makes an appears usually once a week or whenever we have some lettuce. 
What my breakfast looks like (minus the
Bailey's Bottle)
Big Salad is a name for a meal that I stole from Seinfeld many years ago. The episode I'm referring to is the one where Elaine asks George to buy her a Big Salad when he goes to Monk's (the cafe where they always eat). Well George has his girlfriend with her when he buys the salad. George pays for the salad and him and the gf go to Elaine's and the gf is the one that gives the salad to Elaine. Well Elaine thanks the gf not George even though she asked George and George pays for it. So the majority of the episode is how George is pissed at Elaine for not thanking him and he is pissed at his gf because she took his credit for getting and paying for the salad. Love this episode. 
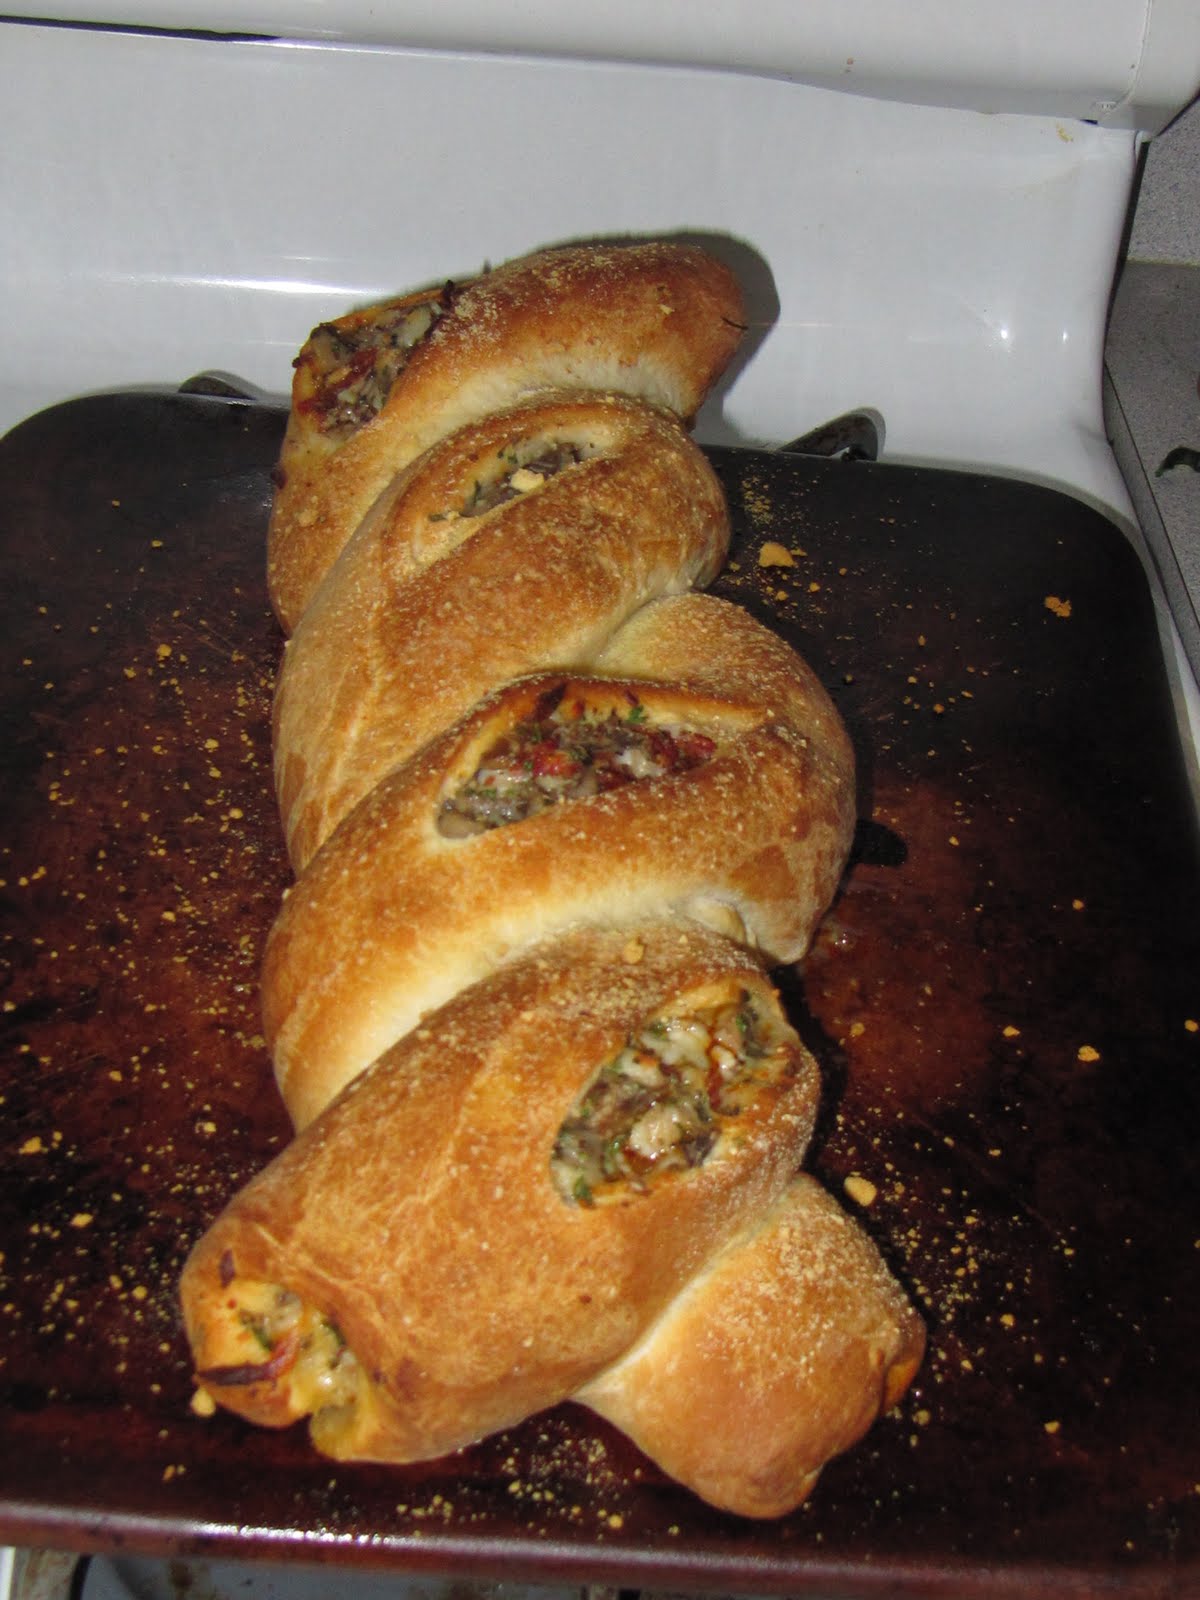
Pizza Twist from Pampered Chef
 So my Big Salad is really any veggies with lettuce. I normally make it when I forget to take meat out of the freezer and I know that I have lettuce. Very often my Big Salad is whatever is left over in the frig that is getting ready to be thrown away. It is normally something like the chicken that has been in there for a few days from the BBQ that we had over the weekend, or the celery that is starting to go limp in the veggie drawer, or I see that spot on the pepper where it is going soft, I just cut it off and use the rest of it. Yup that's how we roll in this house. If it looks bad, cut it off, if you fall and hurt yourself, walk it off...
Coconut Chicken w/ Coconut Rice
The highlight of Big Salad if there is enough time to boil an egg in there. Love hard boiled eggs in my salad and of course I make my own Caesar salad dressing. As much as I would love the drown the whole thing in ranch; ranch isn't the healthiest dressing. But don't kid yourself, if there is none made I do go for the ranch.
Tim made me breakfast.
I'm thinking about starting a recipe link on the side bar or at least post the recipes here then link. Big Salad will probably not be one of them because honestly, it is only leftovers, veggies, and lettuce. And really, you only need the lettuce.